How to Add a File to a Client
For all user roles including administrators, there are two ways to add a file to a client:
Directly Uploading to a Client’s Portfolio
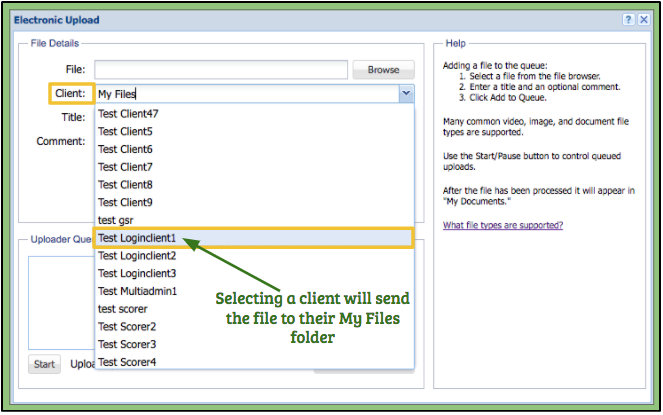
By putting in a client’s name in the Electronic Uploader, the uploaded file will be added to the client’s My Files folder. The user can find the client by using the arrow for the drop-down menu or by typing in the client’s name in the text field. For more information on how to use the Electronic Uploader, please click on the link.
Transferring Files to a Client’s Portfolio
Administrator roles will use the System Admin Window while user roles will use the Client Selector.
Administrator’s System Admin Window:
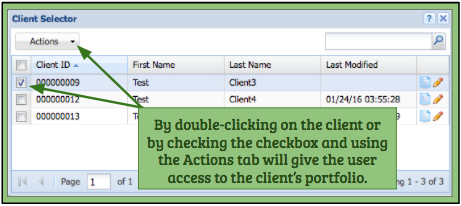
An admin may go to their System Admin Window and either double-click on the client or select the checkbox next to them and use the Actions tab. Both ways will open their portfolio.
User’s Client Selector Window:
A user may go to their Client Selector and either double-click on the client or select the checkbox next to them and use the Actions tab. Both ways will open their portfolio.
– Clicking on a client in either the Client Selector or the System Admin will allow the user access to the client’s portfolio in their File Organizer.
– The user can then go to their own My Files folder and find the file they want to give to their client.
– The user can then:
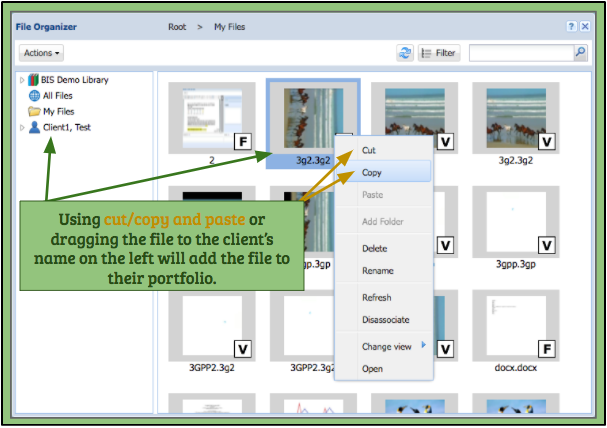
A. Right-click on the file and use copy/cut and paste it once inside the client’s portfolio.
B. Drag the file to the client’s name on the left. This will remove the file from the user’s My Files and add it to the client’s portfolio.
– Double-clicking on the client’s name on the left will open up their portfolio.
– For more information on the File Organizer, please click on the link.


