Setting Up to Receive Notifications
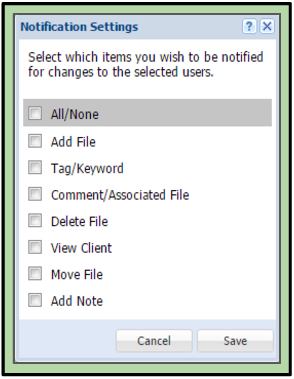
Notifications are an easy way for a user to stay on top of changes to their clients. If a user has access to a client, they can set up to receive specific notifications for them. Administrative roles can also be notified of changes to all user roles available in the System Admin window. There is more information about the specifics of the Notification Settings page.
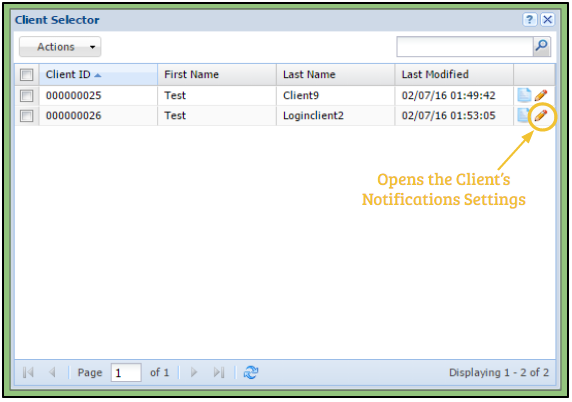 Setting Notifications Using the Client Selector (User Roles)
1. The user opens the Client Selector.
2. Clicking the pencil icon next to the desired client will open their Notification Settings.
3. The user can then check the checkboxes next to the options they want to be notified of.
4. Pressing save will save the changes and the user will then:
A. Receive an email whenever one of the changes selected occur.
B. Have their notifications tab turn red whenever one of the changes selected occur.
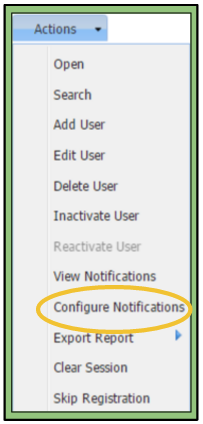 Setting Notifications Using the System Admin Window (Administrative Roles)
1. The user opens the System Admin window.
2. They then can check the checkbox next to the desired user or client.
3. Going to the Actions tab in the upper left-hand corner and clicking “Configure Notifications” will open their Notification Settings.
4. The user can then check the checkboxes next to the options they wish to be notified of.
5. Pressing save will save the changes and the user will then:
A. Receive an email whenever one of the changes selected occur.
B. Have their notifications tab turn red whenever one of the changes selected occur.

