Data Viewers
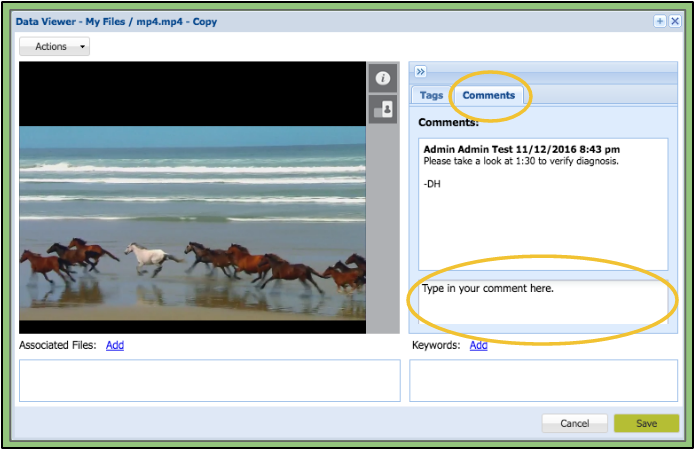
All files within the system will appear in a Data Viewer when opened. Metadata and communication can be annotated within the Data Viewer. A user will be able to add, edit, and delete all metadata only until the user clicks the Save button.
There are two types of Data Viewers, each meant for different types of data:
- Video Player
- PDF & Image Viewer
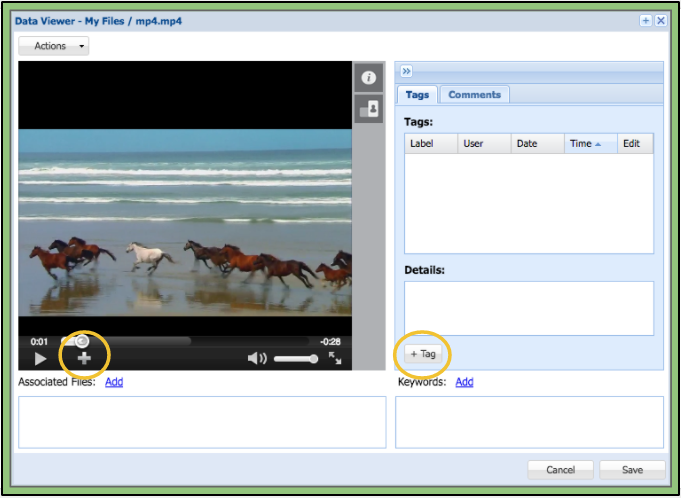
Video Player
The video player is the data viewer made specifically for videos. The video player has the feature of adding tags to specific points in the recording that are important and notable.
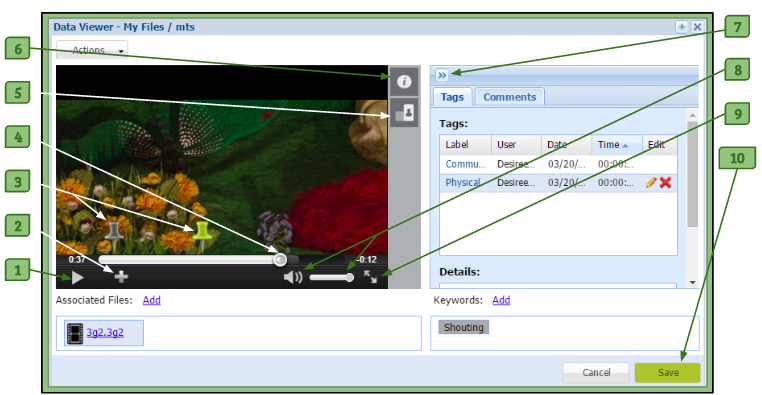
1. Play/Pause
– This arrow will cause the video to start playing or pause the video if it is already playing.
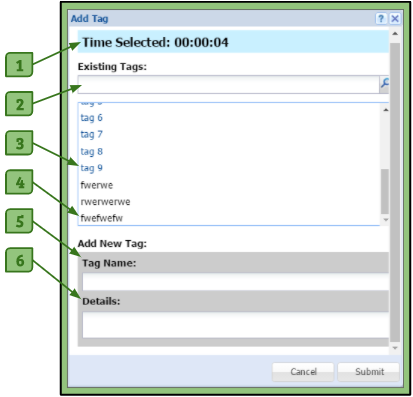
2. Add Tag
– For more information about how to add a tag, please click here.
3. Tag Tacks
– These tacks mark the points at which there are tags. A green tack means it is one that has not been saved while the gray tacks mean they cannot be removed.
4. Time Scrubber
– Allows the user to drag the scrubber to any point within the video.
5. Rotate Viewer
– This icon allows the user to switch the orientation and/or direction of the video.
6. File Information
– Clicking on this icon will open up a window with the following information on the file:
+ Folder Location
+ Recorded On
+ Uploaded By
+ Last Update
+ File Size
7. Collapsible Tab
– These arrows allow the user to collapse the Tag and Comment section to offer more space if needed.
8. Adjust Sound
– By clicking on the soundbar, the user can drag it to adjust the sound. The user can also click on the speaker icon to completely mute the sound, and then click again to put it back to the loudness it was previously.
9. Full Screen
– Clicking on the diagonal arrows allows the user to enlarge the video into full screen. Pressing the “Esc” button on your keyboard or clicking on this button again will bring back the original video player.
10. Save Button
– The save button will turn green when there are changes that have been made and can be saved.
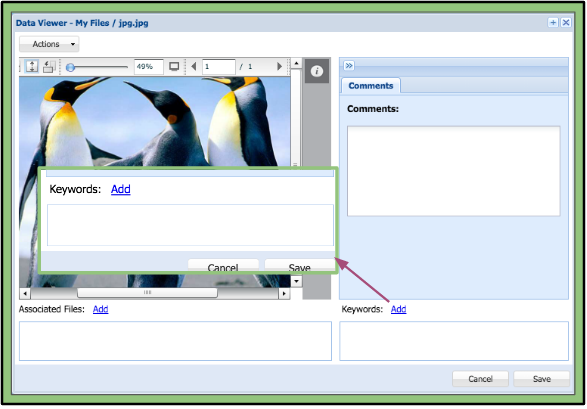
PDF & Image Viewer
The Image Viewer allows the user to view images as well as PDFs and other types of documents. The image viewer however does not have the tags feature, but has options for viewing the documents more efficiently.
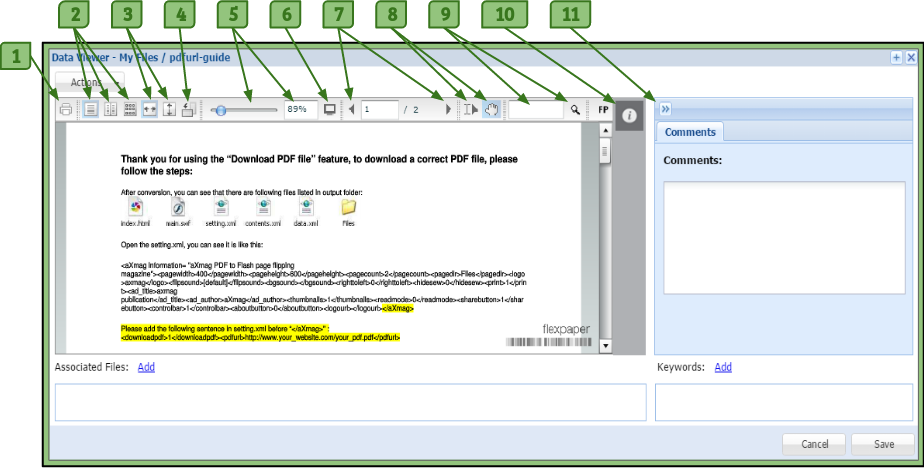
1. Print
– Clicking on this icon brings up a new window with different options for printing the file.
2. Page View Options
– Allows the user to view the file either by one page, two pages, or all pages at a time.
3. Fit Width/Page
– Fits the file to the size of the width or length of the viewer.
4. Rotate Current Page
– This icon allows the user to switch the orientation and/or direction of the current page.
5. Scale Bar/Box
– Allows the user to drag the bar or write in a percentage to zoom in or out on the file.
6. Full Screen
– Clicking on the diagonal arrows allows the user to enlarge the video into full screen. Pressing the “Esc” button or clicking on this button again will bring back the original video player.
7. Previous/Next Page
– Allows the user to go back to the previous page or forward to the next page of the file.
8. Mouse Tools
– These two buttons allow the user to change the style of their mouse arrow.
9. Search Field
– Allows the user to search the file for keywords within the file itself.
10. File Information
– Clicking on this icon will open up a window with the following information on the file:
+ Folder Location
+ Recorded On
+ Uploaded By
+ Last Update
+ File Size
11. Collapsible Tab
– These arrows allow the user to collapse the Comment section to ffer more space if needed. For more information regarding Comments, please click here.