Posts

Client Selector

The Client Selector is available to the User, Scorer, and Gold-Standard Rater roles. It provides a list of the clients that the administrators have given permission to a user to have access to.
The Client Selector will appear once the user logs into the system and can be accessed again via the Action tab on the main toolbar.


Selecting a Client

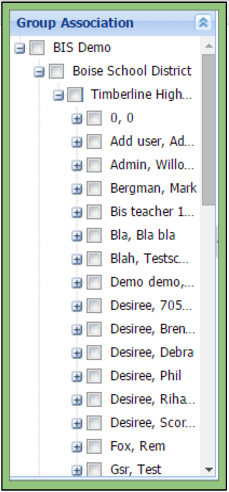
1. All clients associated to the user are populated in this window.
2. The user selects the client they want to access from the list
3. Either double-clicking on the client’s name or going to the Actions tab and clicking Open will allow access to the client.
4. The client’s portfolio will appear in the user’s File Organizer providing a place to view the client’s data.


Client Selector’s Features
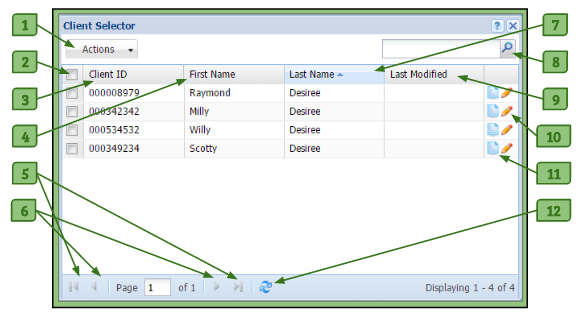
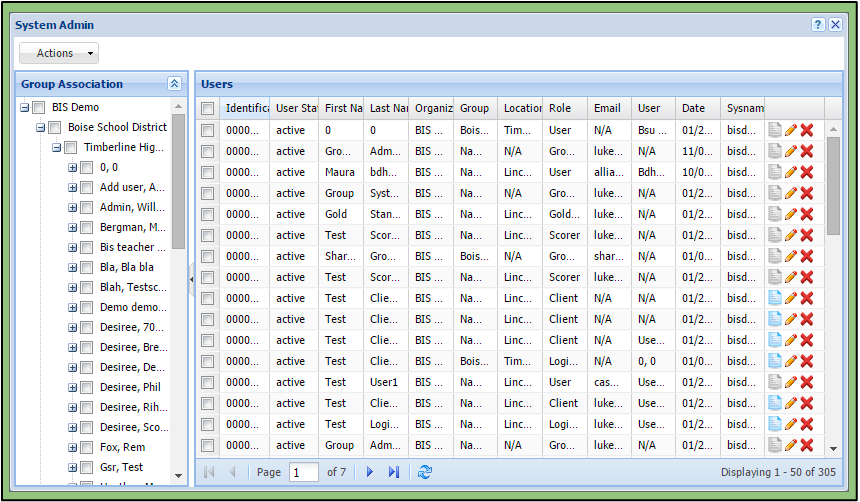
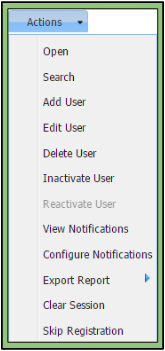
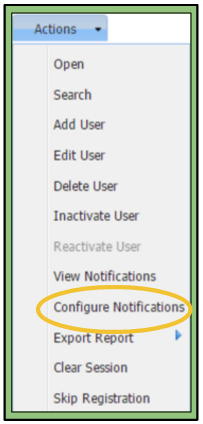
453


Screen Shot 2017-02-26 at 9.33.07 PM1. Actions Menu
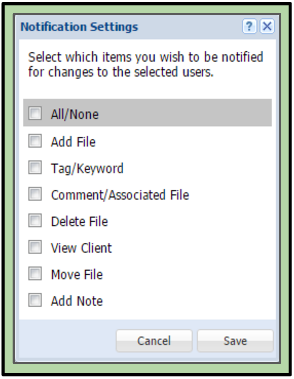
– Allows the user to open a client’s portfolio or configure their notifications for that client after selecting them from the Client Selector.
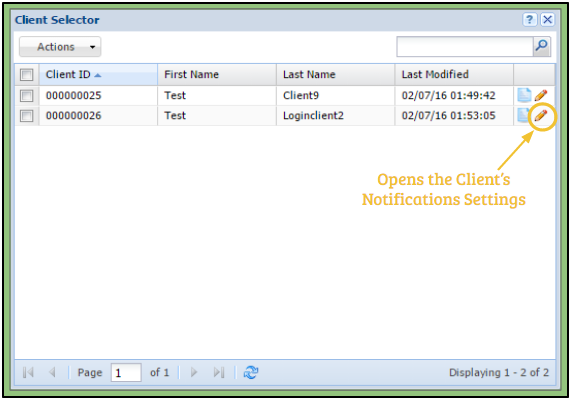
2. Checkbox
– Allows the user to select a client and use the Action dropdown button to open the client’s portfolio or configure the notifications attached to the client’s profile.

3. Client ID Column
– Lists the identification number of the client.

4. First/Last Page Buttons
– Allows the user to either skip to the first page or last page of the Client Selector.

5. Previous/Next Page Buttons
– Allows the user to go the previous page or the next page.

6. Refresh Button
– Allows the user to refresh the Client Selector to see the most up-to-date changes.

7. First Name Column
– Lists the first name of the client.

8. Last Name Column
– Allows the user to list the clients by ascending/descending order of a particular column.

9. Last Modified
– Shows the date and time the client was last updated/edited.

10. Pencil Icon
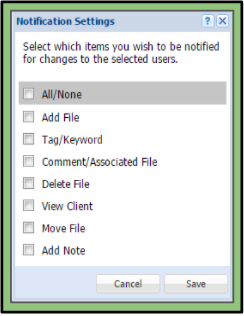
– Allows the user to edit the notification settings that the user will receive regarding that client.

11. Notepad Icon
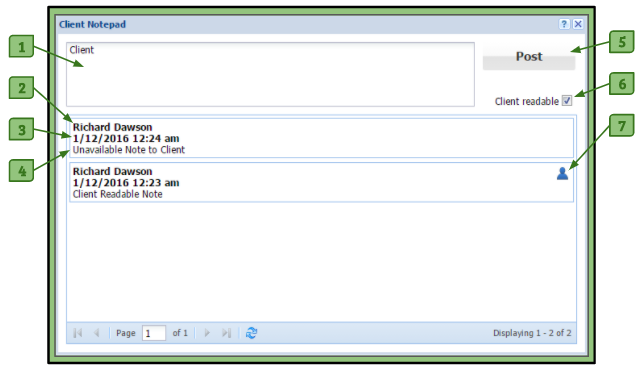
– Allows the user to view the client’s Client Notepad.

12. Search Field
– Allows the user to search for a specific client by using their Client ID, last name, or first name.


Organizing the Client Selector

Screen Shot 2017-02-26 at 9.27.12 PM

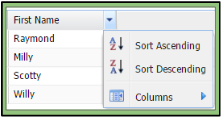
When hovering over a column header in the Client Selector, an arrow will appear in the right corner of the column header. Clicking on it will create a dropdown menu, where you can choose to list the clients by ascending/descending order for that particular column. Another dropdown menu, titled Columns, allows you to check and uncheck columns which you would like to hide or view in your Client Selector.

System Admin Window

The System Admin window provides administrators the ability to add, edit, and delete all users and clients within the system. It also provides access to all files within the organization’s Enterprise Account.

The System Admin window has three main parts to it:
1. Main Table
2. Actions Tab
3. Group Associations Table


Main Table

The Main Table of the System Admin allows for selecting a user of any role or a client. All users are listed here.
Double Clicking on a client will place the client’s portfolio in the Admin’s File Organizer. The page cycling options at the bottom allow you to view other users on different pages.

Screen Shot 2017-03-08 at 11.43.29 PM

The column headings of the users table, in order, includes:
1. Identification Number
2. First Name
3. Last Name
4. Organization
5. Group
6. Location
7. Role
8. Email
9. User/Associated Users
10. Sysname (Name of URL)

When hovering over a column heading, a down arrow will appear on the far right side of heading title. Clicking on the down arrow will allow the user to change the order in which the clients are sorted. It will also allow the user to hide or show each of the column types.


Screen Shot 2017-03-08 at 11.24.05 PMActions Tab

1. Open:
– After using the checkbox to select a user from the adjacent users table, this action will open the File Organizer and display the user’s portfolio.
2. Search:
– The search can be used to search/filter multiple types of criteria. Click here for more information about search options.
3. Add User:
– Allows Admin to create another user/client in the system. Both Personal Details and Group Association tabs need to be filled out in order to add a user.
4. Editing a User:
– Using the checkbox to select a user from the users’ table of the System Admin with this action allows an Admin to edit information in the user’s/client’s profile. Clicking on the pencil on the users table also provides the Admin a way to edit profile.
5. Deleting a User:
– Using the checkbox to select a user from the users table and then clicking this action allows an Admin to delete the user’s/client’s profile. Clicking on the ”X” on the users table will also allow the Admin a way to delete the user/client.
6. Inactivate User:
– Using the checkbox to select a user from the users table with this action allows an Admin to inactivate a user’s/client’s profile. Inactivating the user/client will allow the Admin to keep the portfolio within the system, but not active to access or login.
7. Reactivate User:
– Using the checkbox to select a user from the users table with this action allows an Admin to reactivate a user’s/client’s profile. Reactivating the user/client will activate that user/client that was inactive back to their active status and accessibility.
8. View Notifications:
– Using the checkbox to select a user from the users table with this action allows an Admin to review all notifications that were set by the Admin for a user’s or client’s portfolio.
9. Configure Notifications:
– This allows the Admin the ability to configure what notifications they will receive per user/client.
10. Export Report:
– This allows the Admin the ability to download the search results from the users table into a CSV file.
11. Clear Session:
– This allows the Admin the function to clear any user’s session if they logged out incorrectly and are not able to log in. This will clear their session immediately so they don’t have to wait the 10 minutes for the system to automatically clear their session to log in.
12. Skip Registration:
– Using the checkbox to select a user/users from the table with this action allows an Admin to remove the steps of registering on the site for that user. They will not have to recreate their password, username, or add in their email address before first using the system. You must add an email address in order for your user to receive any notifications. A reminder will pop-up after clicking this box.


Screen Shot 2017-03-08 at 11.41.59 PMGroup Association Table

The Group Association Table allows the Admin to view users and clients via their Group Associations.

– The table allows the Admin to select from the Organization, Group, Location, and/or Role levels.
– It also allows for a quick search to populate the adjacent Users Window with Clients, Users, Scorers, or Gold Standard Raters that are associated to each other.
– The Admin can use the checkboxes to define the search parameters and the “+” signs to delve into the selection.

Setting Up to Receive Notifications

Notifications are an easy way for a user to stay on top of changes to their clients. If a user has access to a client, they can set up to receive specific notifications for them.  Administrative roles can also be notified of changes to all user roles available in the System Admin window. There is more information about the specifics of the Notification Settings page.

1


4Setting Notifications Using the Client Selector (User Roles)

1. The user opens the Client Selector.
2. Clicking the pencil icon next to the desired client will open their Notification Settings.
3. The user can then check the checkboxes next to the options they want to be notified of.
4. Pressing save will save the changes and the user will then:
A. Receive an email whenever one of the changes selected occur.
B. Have their notifications tab turn red whenever one of the changes selected occur.


5Setting Notifications Using the System Admin Window (Administrative Roles)

1. The user opens the System Admin window.
2. They then can check the checkbox next to the desired user or client.
3. Going to the Actions tab in the upper left-hand corner and clicking “Configure Notifications” will open their Notification Settings.
4. The user can then check the checkboxes next to the options they wish to be notified of.
5. Pressing save will save the changes and the user will then:
A. Receive an email whenever one of the changes selected occur.
B. Have their notifications tab turn red whenever one of the changes selected occur.

Notification Settings

The Notification Settings window pops up after clicking on the actions tab of the System Admin (available for Admins, Group System Admins, and Group Admins)  or the actions tab in the Client Selector (available for Users, Scorers, and Gold Standard Raters). This window allows the Admin the ability to configure what notifications they will receive per user/client.


Prefigured Notifications

When a new user/client is added to the system, they are prefigured with the notifications of the following:
– Add File
– Add Tag/Keyword
– Add Comment/Associated File
– Add Note
This is the case for all users except the Admin themselves. The Admin must configure all notifications for the users for which options they want notifications for.


Available Notification Settings

Screen Shot 2017-03-08 at 9.01.40 PM

1. All/None
2. Add File
3. Tag/Keyword
4. Comment/Associated file
5. Delete File
6. View Client
7. Move File
8. Add Note

Check the boxes for which actions each individual user wants to be notified of. An email will be sent to the user notifying them that an action has occurred as well as turning the Notifications button red on the main toolbar on the site.

Client Notepad Feature

The Client Notepad allows users with permissions to create and view notes regarding a client.

All users and admins associated with this client will have access to these notes.
Login Clients are capable of viewing notes that a user makes available to them.


Client Notepad’s Location

The Client Notepad can be found in the System Admin feature for Admins, Group System Admins, and Group Admins.
– After opening the System Admin, to the right in the columns of each user is a notepad which can be accessed.

Users can find the Client Notepad in the Client Selector.
– Each client will have a notepad icon in their column.
Login Clients can access their Client Notepad through their Notifications tab.


Adding a Note

1. The user clicks on a client’s notepad.
2. They then type a note in the top text field.
3. The user chooses if the note is intended for the client to read.
– If so, the user clicks on the Client Readable checkbox.
4. The user reviews their note and clicks on the Post button.


Client Notepad Diagram

54343

1. Text Box
– The user writes in the note to be recorded here.

2. User’s Name
– The first line on the recorded note is the name of the user that authored it.

3. Date/Time Stamp
– This stamp shows when the user created the note.

4. Note
– This is the text of the note that has been submitted by the user.

5. Post Button
– By pressing this button it will submit the text to the left as a note.

6. Client Readable Checkbox
– By checking this box, it allows a login client to view the note the user is posting. A pop-up window will occur when this box is selected reminding the user that the client will be able to view the note.
Please note: Clients that are not login clients will not have this option available on their notepad.

7. Head Symbol
– This symbol marks the notes that can be viewed by the login client.