
Behavior Capture App™
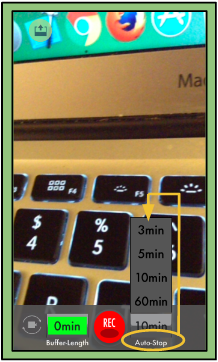
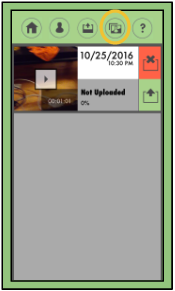
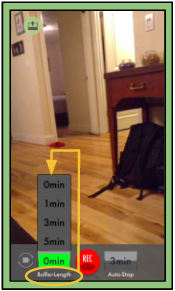
The Behavior Capture™ app will allow the user/login client to upload evidence directly into the user/login client’s “My Files” folder. To do this, simply record video evidence, select the video to upload, and log into the app to directly upload to the user/login client account.
Download Information
To download the Behavior Capture™ app, please use the following link: https://itunes.apple.com/us/app/behavior-capture/id781632995?mt=8
Compatibility
- Requires iOS 7.0 or later.
- Can be used on an iPhone, iPad, or iTouch.
- This app is optimized for iPhone 5.