There are three types of roles available for an administrator:
- Basic Admin role
- Group Admin role
- Group System Admin role
Admin
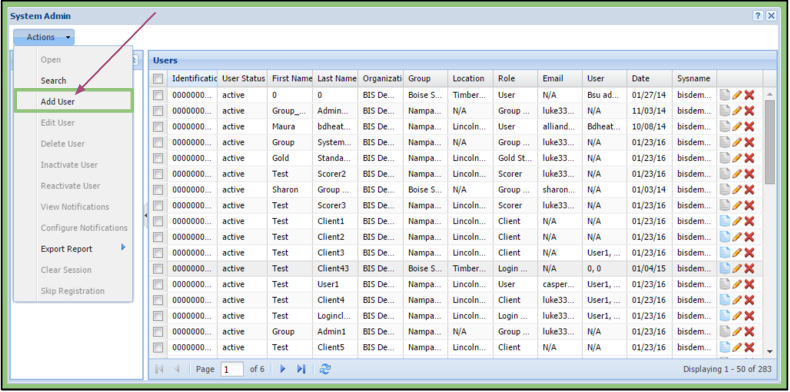
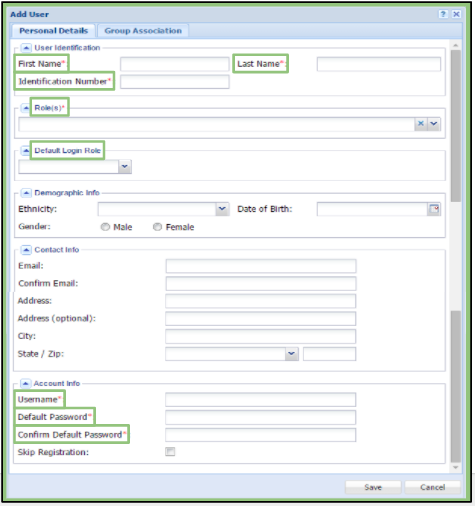
The Admin role has access to all users, folders, files and data of the entire Enterprise Account. The admin has the tools to add, delete, and edit all users, files, and folders within the system.
Admins have complete access to the entire account.
This includes the following tabs:
Actions:
1. System Admin
– Client Notepad
2. File Organizer
– Library
– All Files
– My Files
Upload:
1. Electronic
2. FAX
3. App
Reports:
1. Reports
Notifications:
1. Notifications
Settings:
1. Update Profile
Help:
1. Support Query
2. KnowledgeBase
Admins are able to add, edit, and delete all users and clients.
This includes the following:
– Other Admins
– Group System Admins
– Group Admins
– Scorers
– Gold Standard Raters
– Users
– Login Clients
– Clients
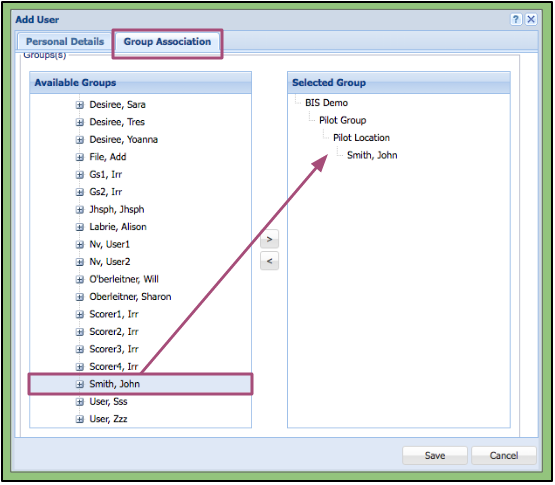
Admin’s are able to associate the following with each other:
– Clients/Login Clients with Users
– Clients/Login Clients with Scorers
– Clients/Login Clients with Gold Standard Rater
– Users with Locations
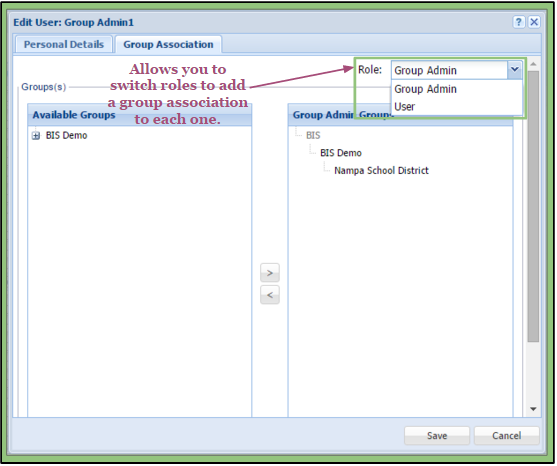
– Group Admins with Groups
– Group System Admins with Groups
– Scorers with Locations
– Gold Standard Rater with Locations
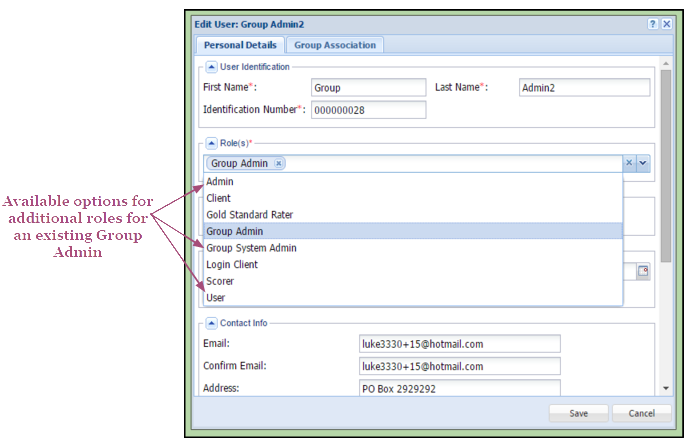
Group Admin
The Group Admin role has access to all users, folders, files, and data in their assigned Group(s). Group Admins have access to only the Group(s) they are associated to within the account. Unlike the Admin role, the Group Admin role cannot add, delete, or edit users and clients.
Group Admin’s accessibility includes the following tabs:
Actions:
1. System Admin
– Client Notepad
2. File Organizer
– Library
– All Files
– My Files
Upload:
1. Electronic
2. FAX
3. App
Reports:
1. Reports
Notifications:
1. Notifications
Settings:
1. Update Profile
Help:
1. Support Query
2. KnowledgeBase
Group Admins can view these roles that are only within their group:
– Group System Admins
– Other Group Admins
– Scorers
– Gold Standard Raters
– Users
– Clients
– Login Clients
Group System Admin
The Group System Admin role has access to all users, folders, files, and data of their associated Group.
Group System Admins have access to only the Group(s) they are associated to within the account. Unlike the Group Admin, the Group System Admin has the tools to add, delete, and edit the users and clients within their group.
Group System Admin’s accessibility includes the following tabs:
Actions:
1. System Admin
– Client Notepad
2. File Organizer
– Library
– All Files
– My Files
Upload:
1. Electronic
2. FAX
3. App
Reports:
1. Reports
Notifications:
1. Notifications
Settings:
1. Update Profile
Help:
1. Support Query
2. KnowledgeBase
Group System Admins can delete, add, and edit users that are only within their group.
This includes the following users and clients:
– Other Group System Admins
– Group Admins
– Scorers
– Gold Standard Raters
– Users
– Login Clients
– Clients
Group System Admins can add associations to users only within their group.
Admin’s are able to associate the following with each other:
– Clients/Login Clients with Users
– Clients/Login Clients with Scorers
– Clients/Login Clients with Gold Standard Rater
– Users with Locations
– Scorers with Locations
– Gold Standard Rater with Locations
– Group Admins with Groups
– Group System Admins with Groups