How to Add a User (Admins Only)
By opening the System Admin, clicking on the Actions menu, and selecting “Add User”, the Admin will be able to create a new user for their system.
Personal Details Tab
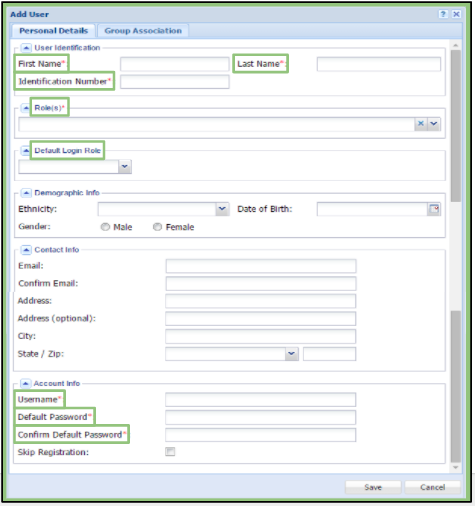
Required fields on both the Group Association and Personal Details tab are marked with a red asterisk (*). They can be seen in green below as well.
 – First Name
– Last Name
– Identification Number
– Role(s)
– Default Login Role
– Demographic Info
– Ethnicity
– Date of Birth
– Gender
– Contact Info
– Email
– Address
– City, State, Zip
– Account Info
– Username
– Password
– Skip Registration
Please Note:
– Checking the ‘Skip Registration’ box allows an Admin to remove the steps of registering on the site for the user being added.
– Users will be listed as “Not Registered” in the System Admin if this feature is used when creating them.
– The Admin must add an email address in order for your user to receive any notifications. A reminder will pop-up after clicking this box.
Group Association Tab
An Admin will need to associate the role with an Organization, Group, Location, and/or User, depending on the added role.
To associate, highlight the name needed in “Available Groups” from the left section and either drag and drop to the “User Groups” section or click on the arrows to transfer it.
Required Associations for Each Role:
Admin – Organization
Client – Group
Location
User
Please note by adding the user to a client, it gives the selected user access to the client.
Gold Standard Rater – Group and Location
Group Admin – Group
Group System Admin – Group
Login Client – Group and Location
Scorer – Group and Location
User – Group and Location
Please note that the system will notify the Admin if group association is not correct.


